Deploy a Go API to AWS Lambda and API Gateway
In this article, I am going to describe the process of deploying an API coded with Go to AWS Lambda and Amazon API Gateway, a process that takes only a few minutes if you know how to do it.
We will see how easy it is to deploy a Lambda function and validate requests and API keys via the API Gateway.
I will assume that you have a basic knowledge of Go and an AWS account. If you don’t know anything about AWS Lambda and API Gateway, don’t worry, all you need to know is explained here. If you already have a good knowledge of Lambda and API Gateway, feel free to skip some of the explanations.
Create a Lambda function using Go
As you probably know already, with AWS Lambda you can “run code without provisioning or managing infrastructure. Simply write and upload code as a .zip file or container image.”
Creating a Lambda function is pretty easy. You need some code and a Lambda function where to upload it. We will start with the code.
All you need to know is that you need to import github.com/aws/aws-lambda-go/lambda and create a “handler”. There is already a very good explanagion about which arguments can this function take, so it is not worth repeating it:
https://docs.aws.amazon.com/lambda/latest/dg/golang-handler.html
Let’s create a very simple function that will only get a team name and an array with the members, and return the name of the team and the number of members. You can find the code here: https://github.com/antsanchez/go-lambda-apigateway-example
package main

import (
	"github.com/aws/aws-lambda-go/lambda"
)

type TeamRequest struct {
	Name    string   `json:"name"`
	Members []string `json:"members"`
}

type Response struct {
	Name         string `json:"name"`
	MembersCount int    `json:"members_count"`
}

func GetTeamAndMembers(req TeamRequest) (Response, error) {
	return Response{
		Name:         req.Name,
		MembersCount: len(req.Members),
	}, nil
}

func main() {
	lambda.Start(GetTeamAndMembers)
}
Once the function has been created, you have to compile the code and create a ZIP for uploading it to AWS Lambda:
$ GOOS=linux go build main.go
% zip function.zip main
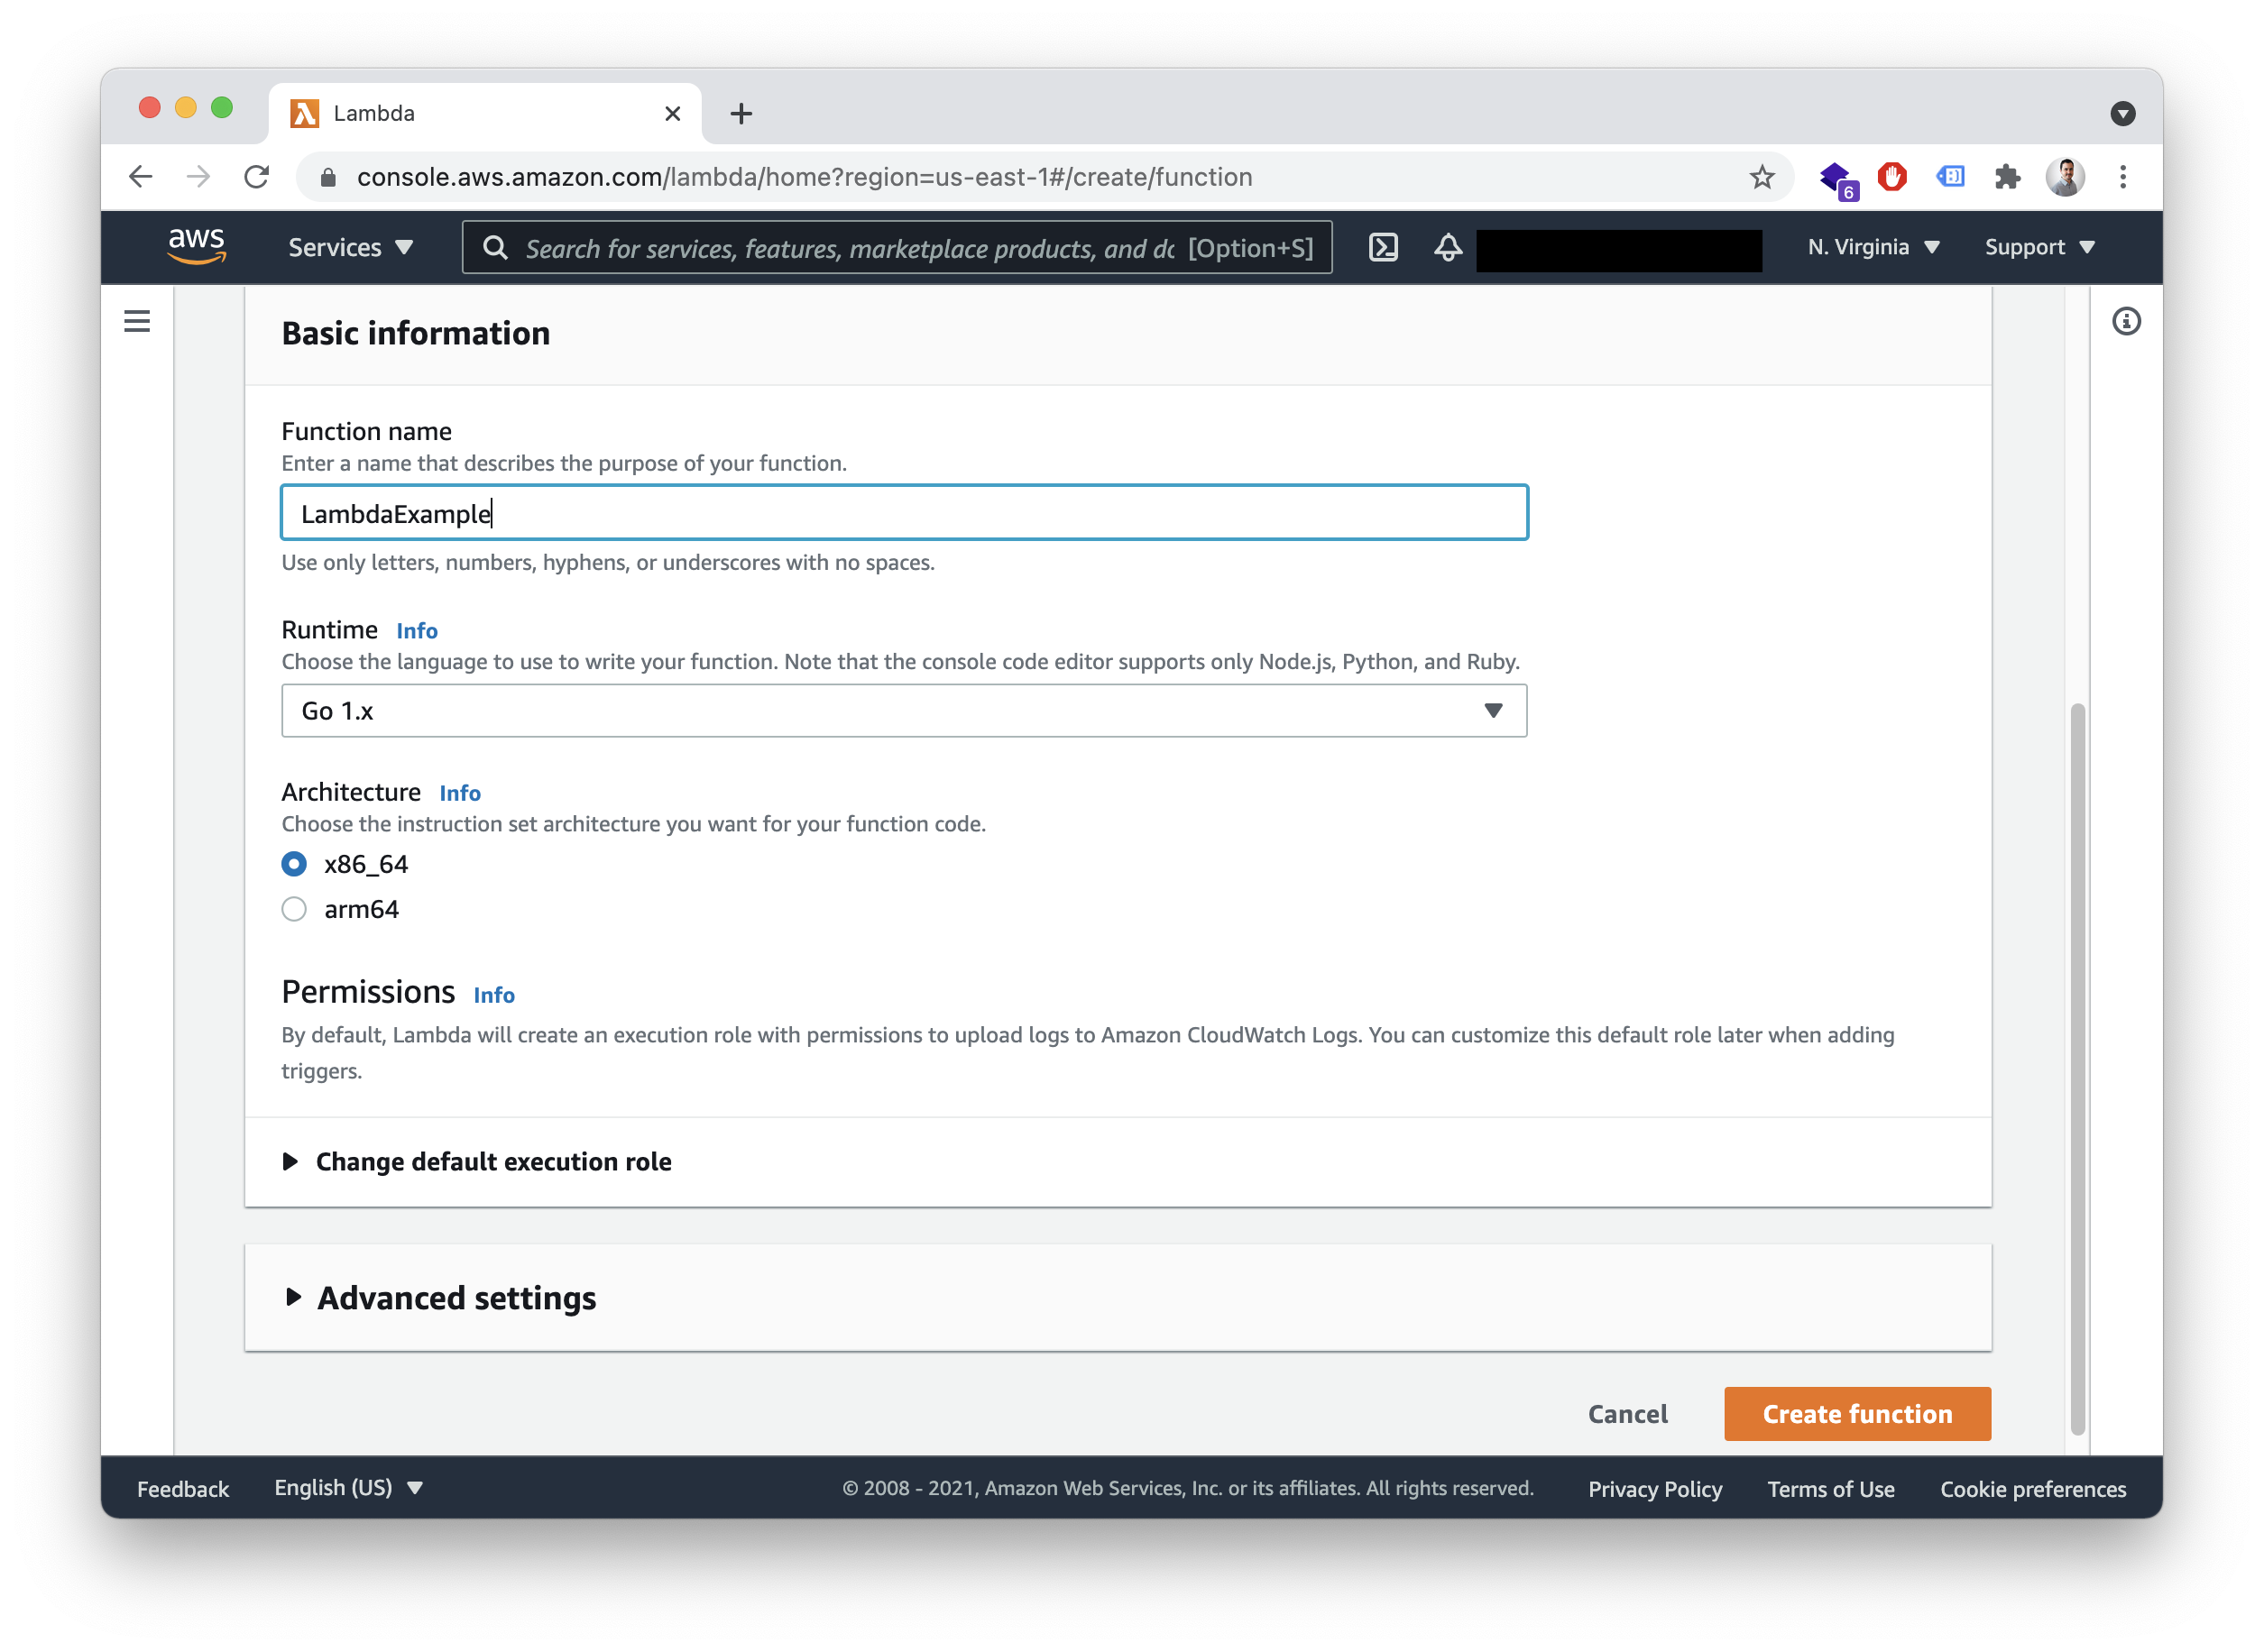
Now let’s go to the AWS console, search for Lambda, and click on create a new function. Pick whatever name you like, select Go, leave the rest as it is for now and click on create.
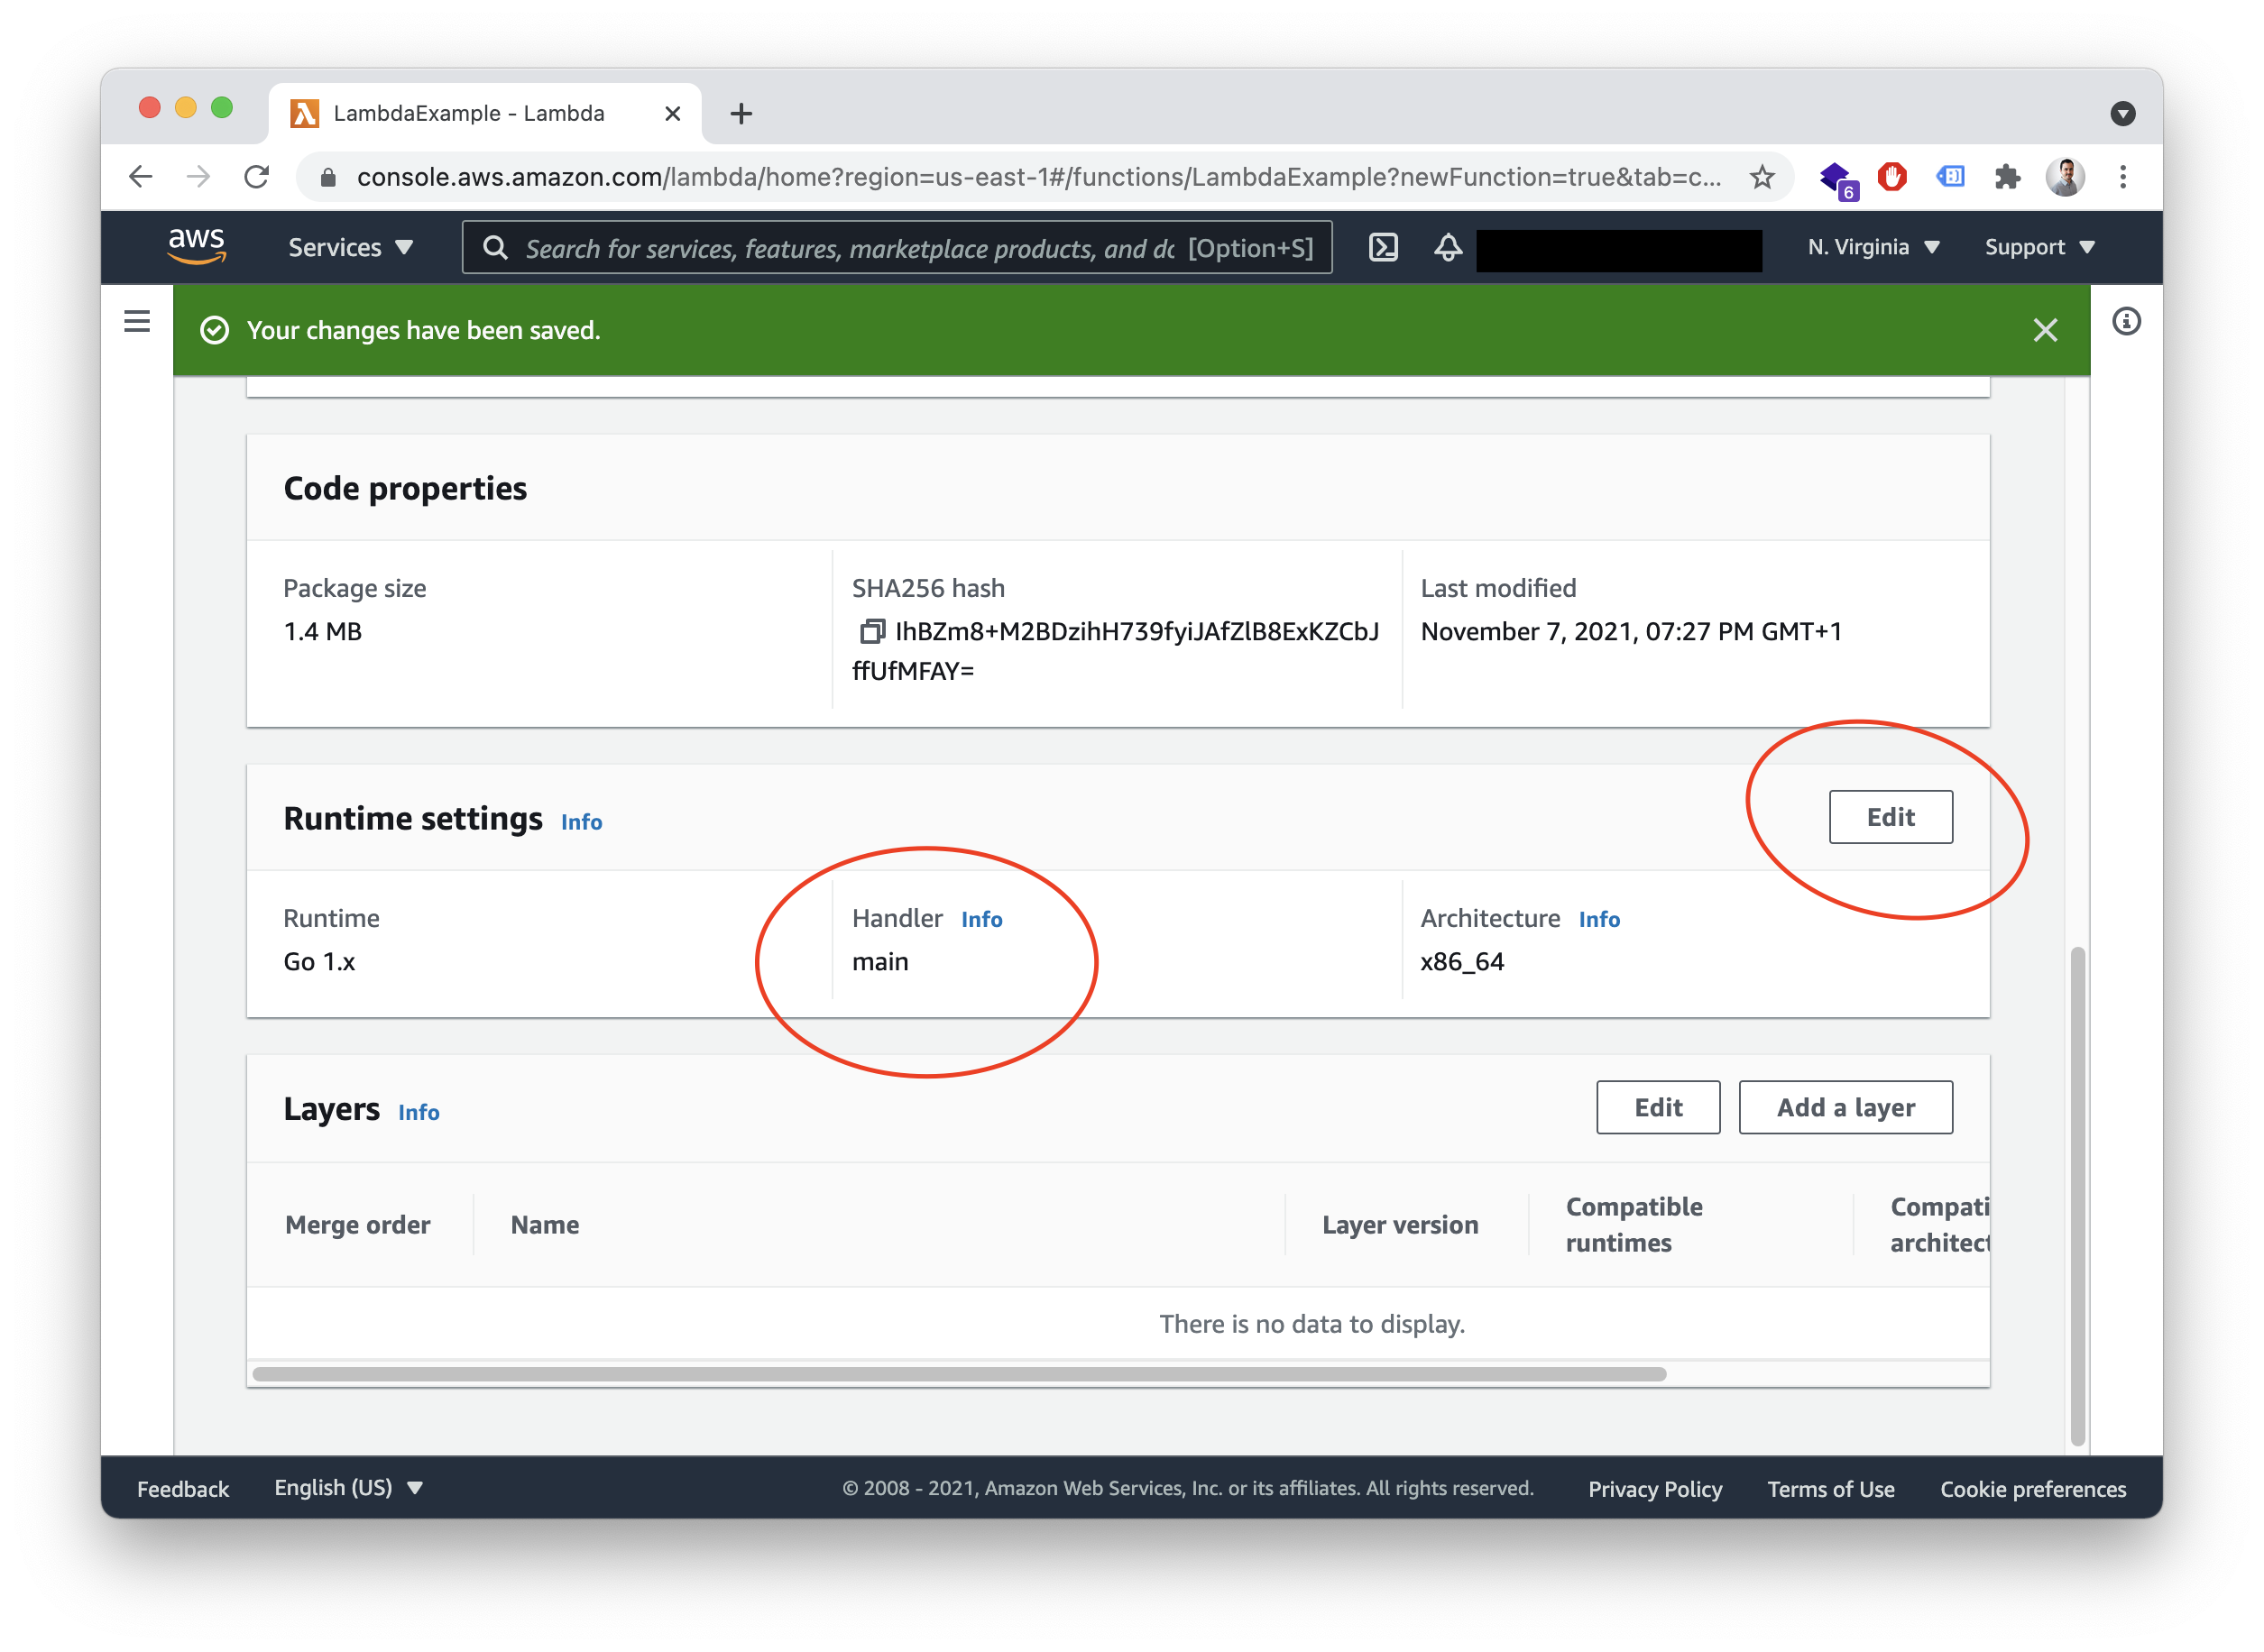
In the next screen, make sure to change the handler to “main”, as on the following screenshot:
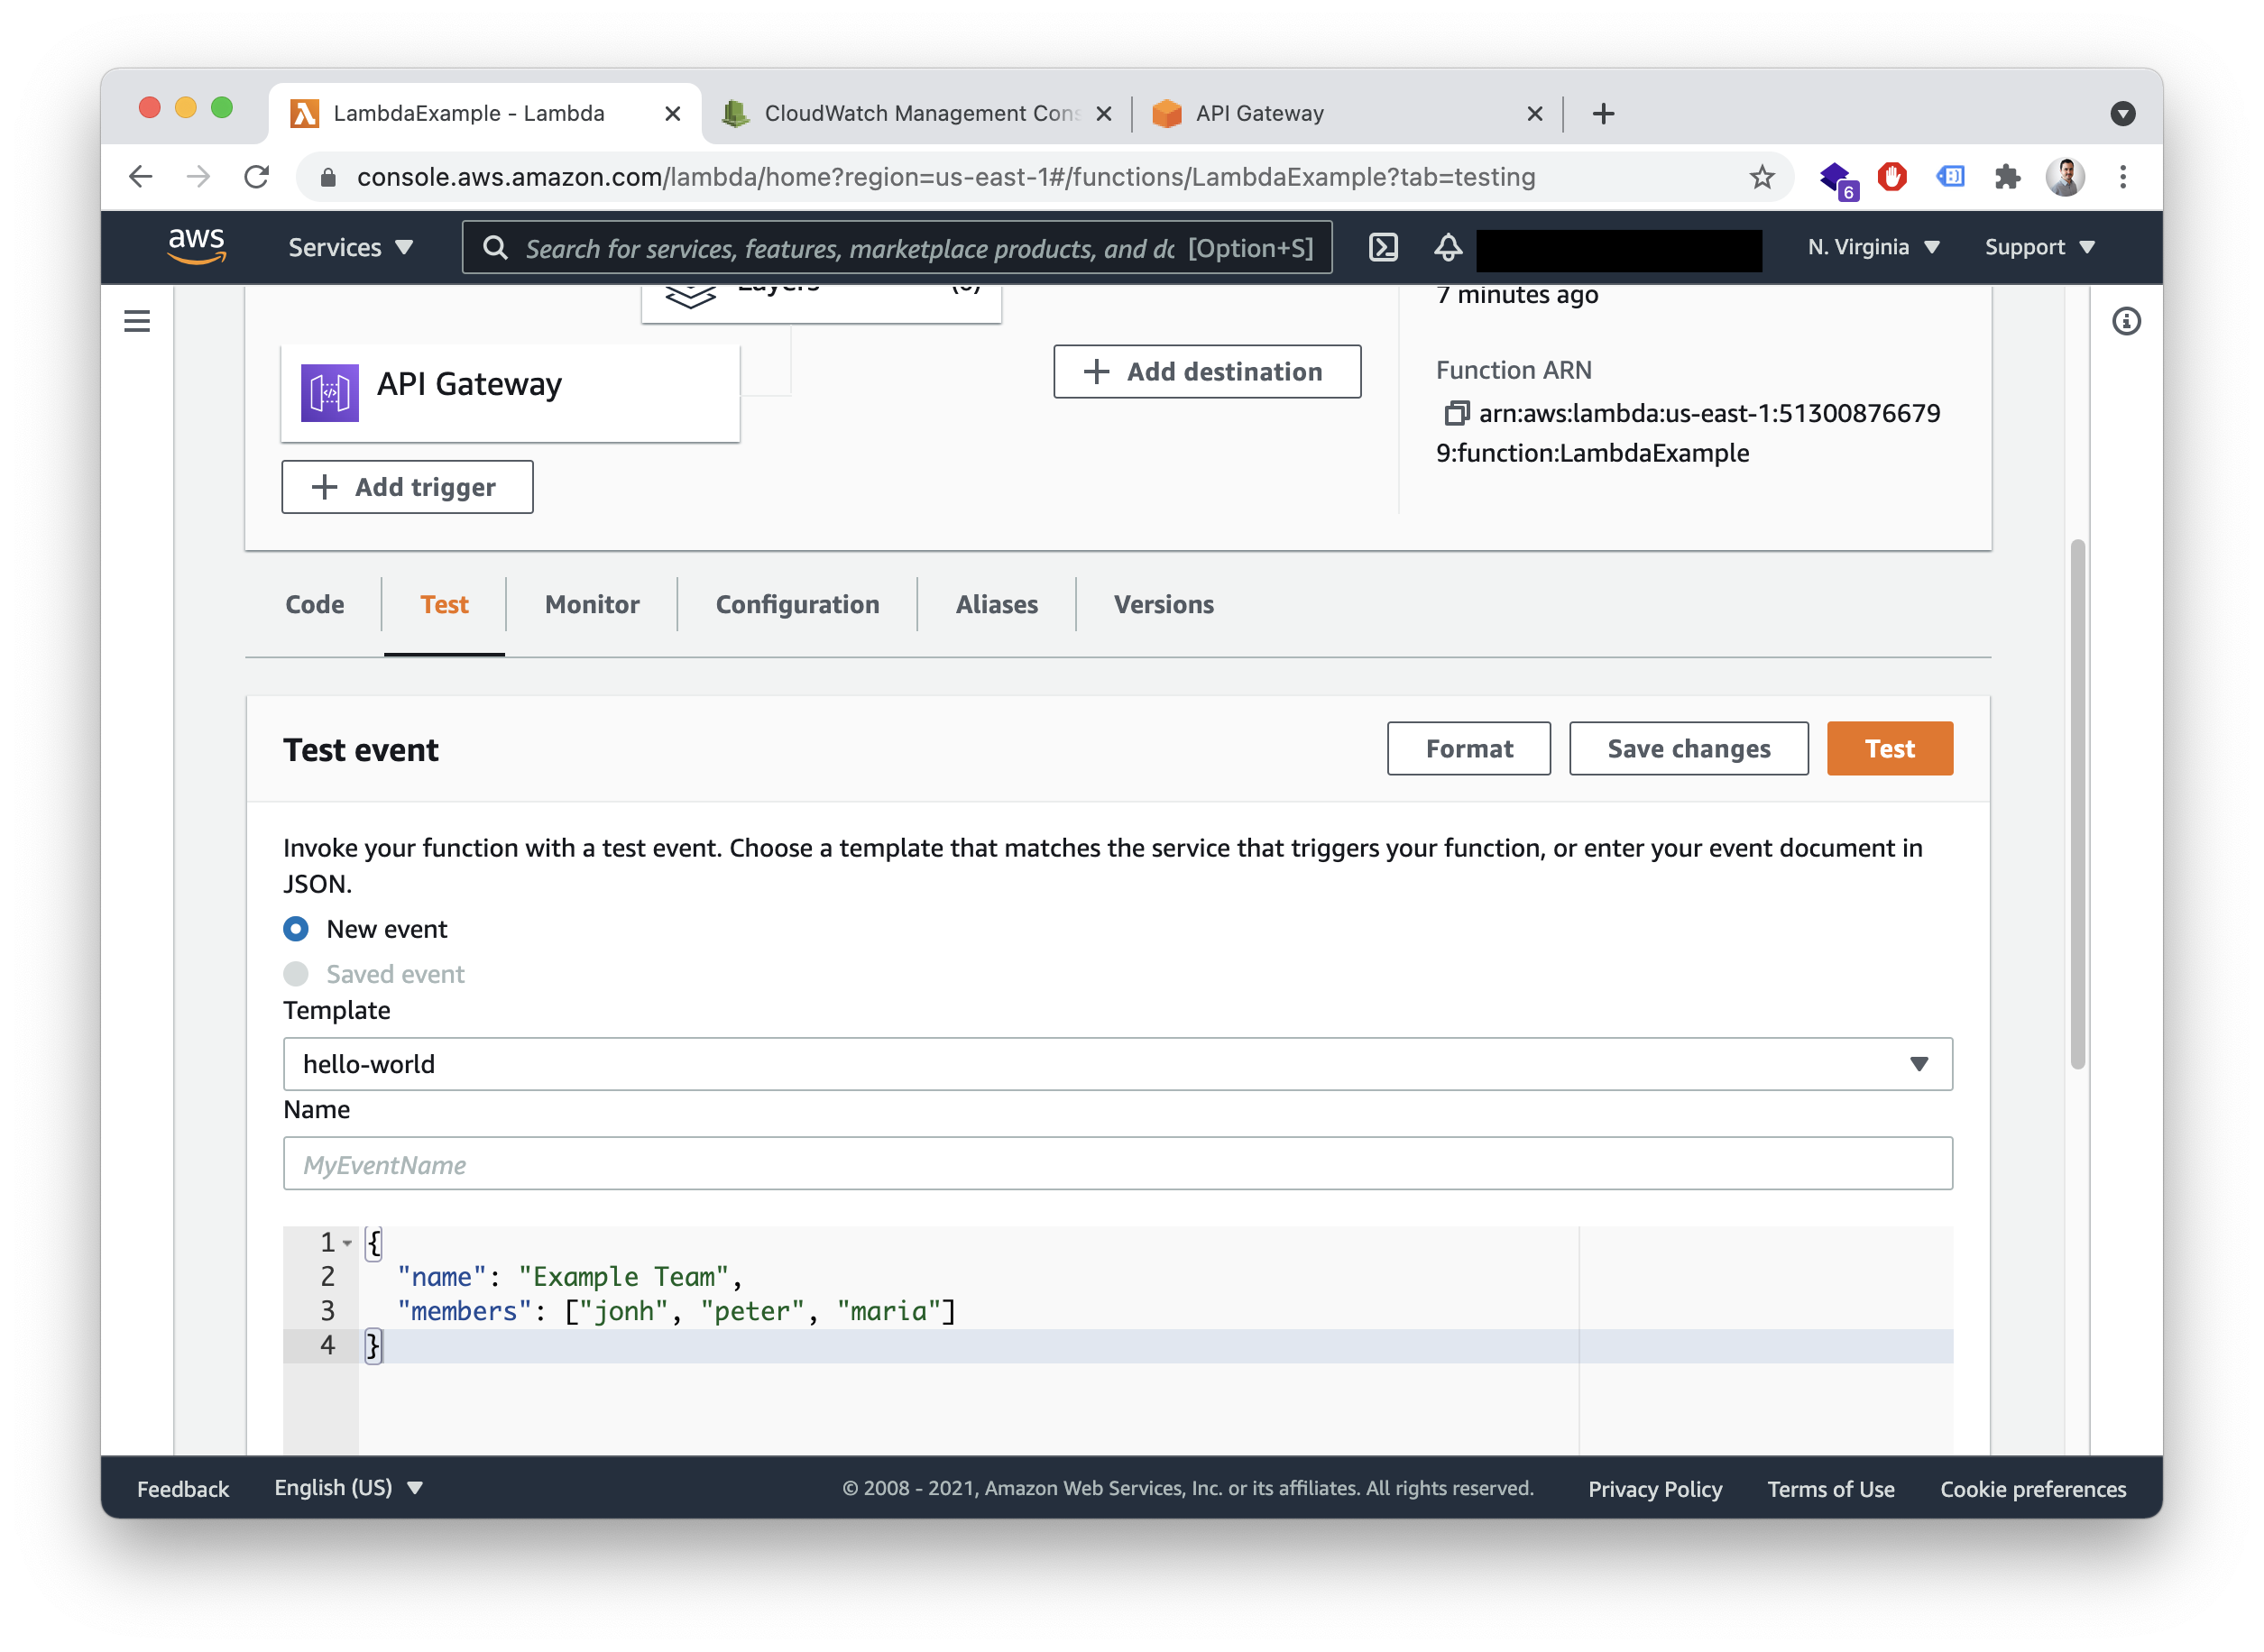
Now upload the ZIP folder and that’s it, your function is ready to use! Before switching to API Gateway, let’s test it. Go to the “Test” tab and create a request, like this:
You should see this response:
{
  "name": "Example Team",
  "members_count": 3,
}
Create the API Gateway trigger for the Lambda function
Ok, the Lambda function exists now, but how can you access it? We need to create a trigger, in this case, an API Gateway trigger. This is going to create an API Endpoint for us that we can use to call our Lambda function.
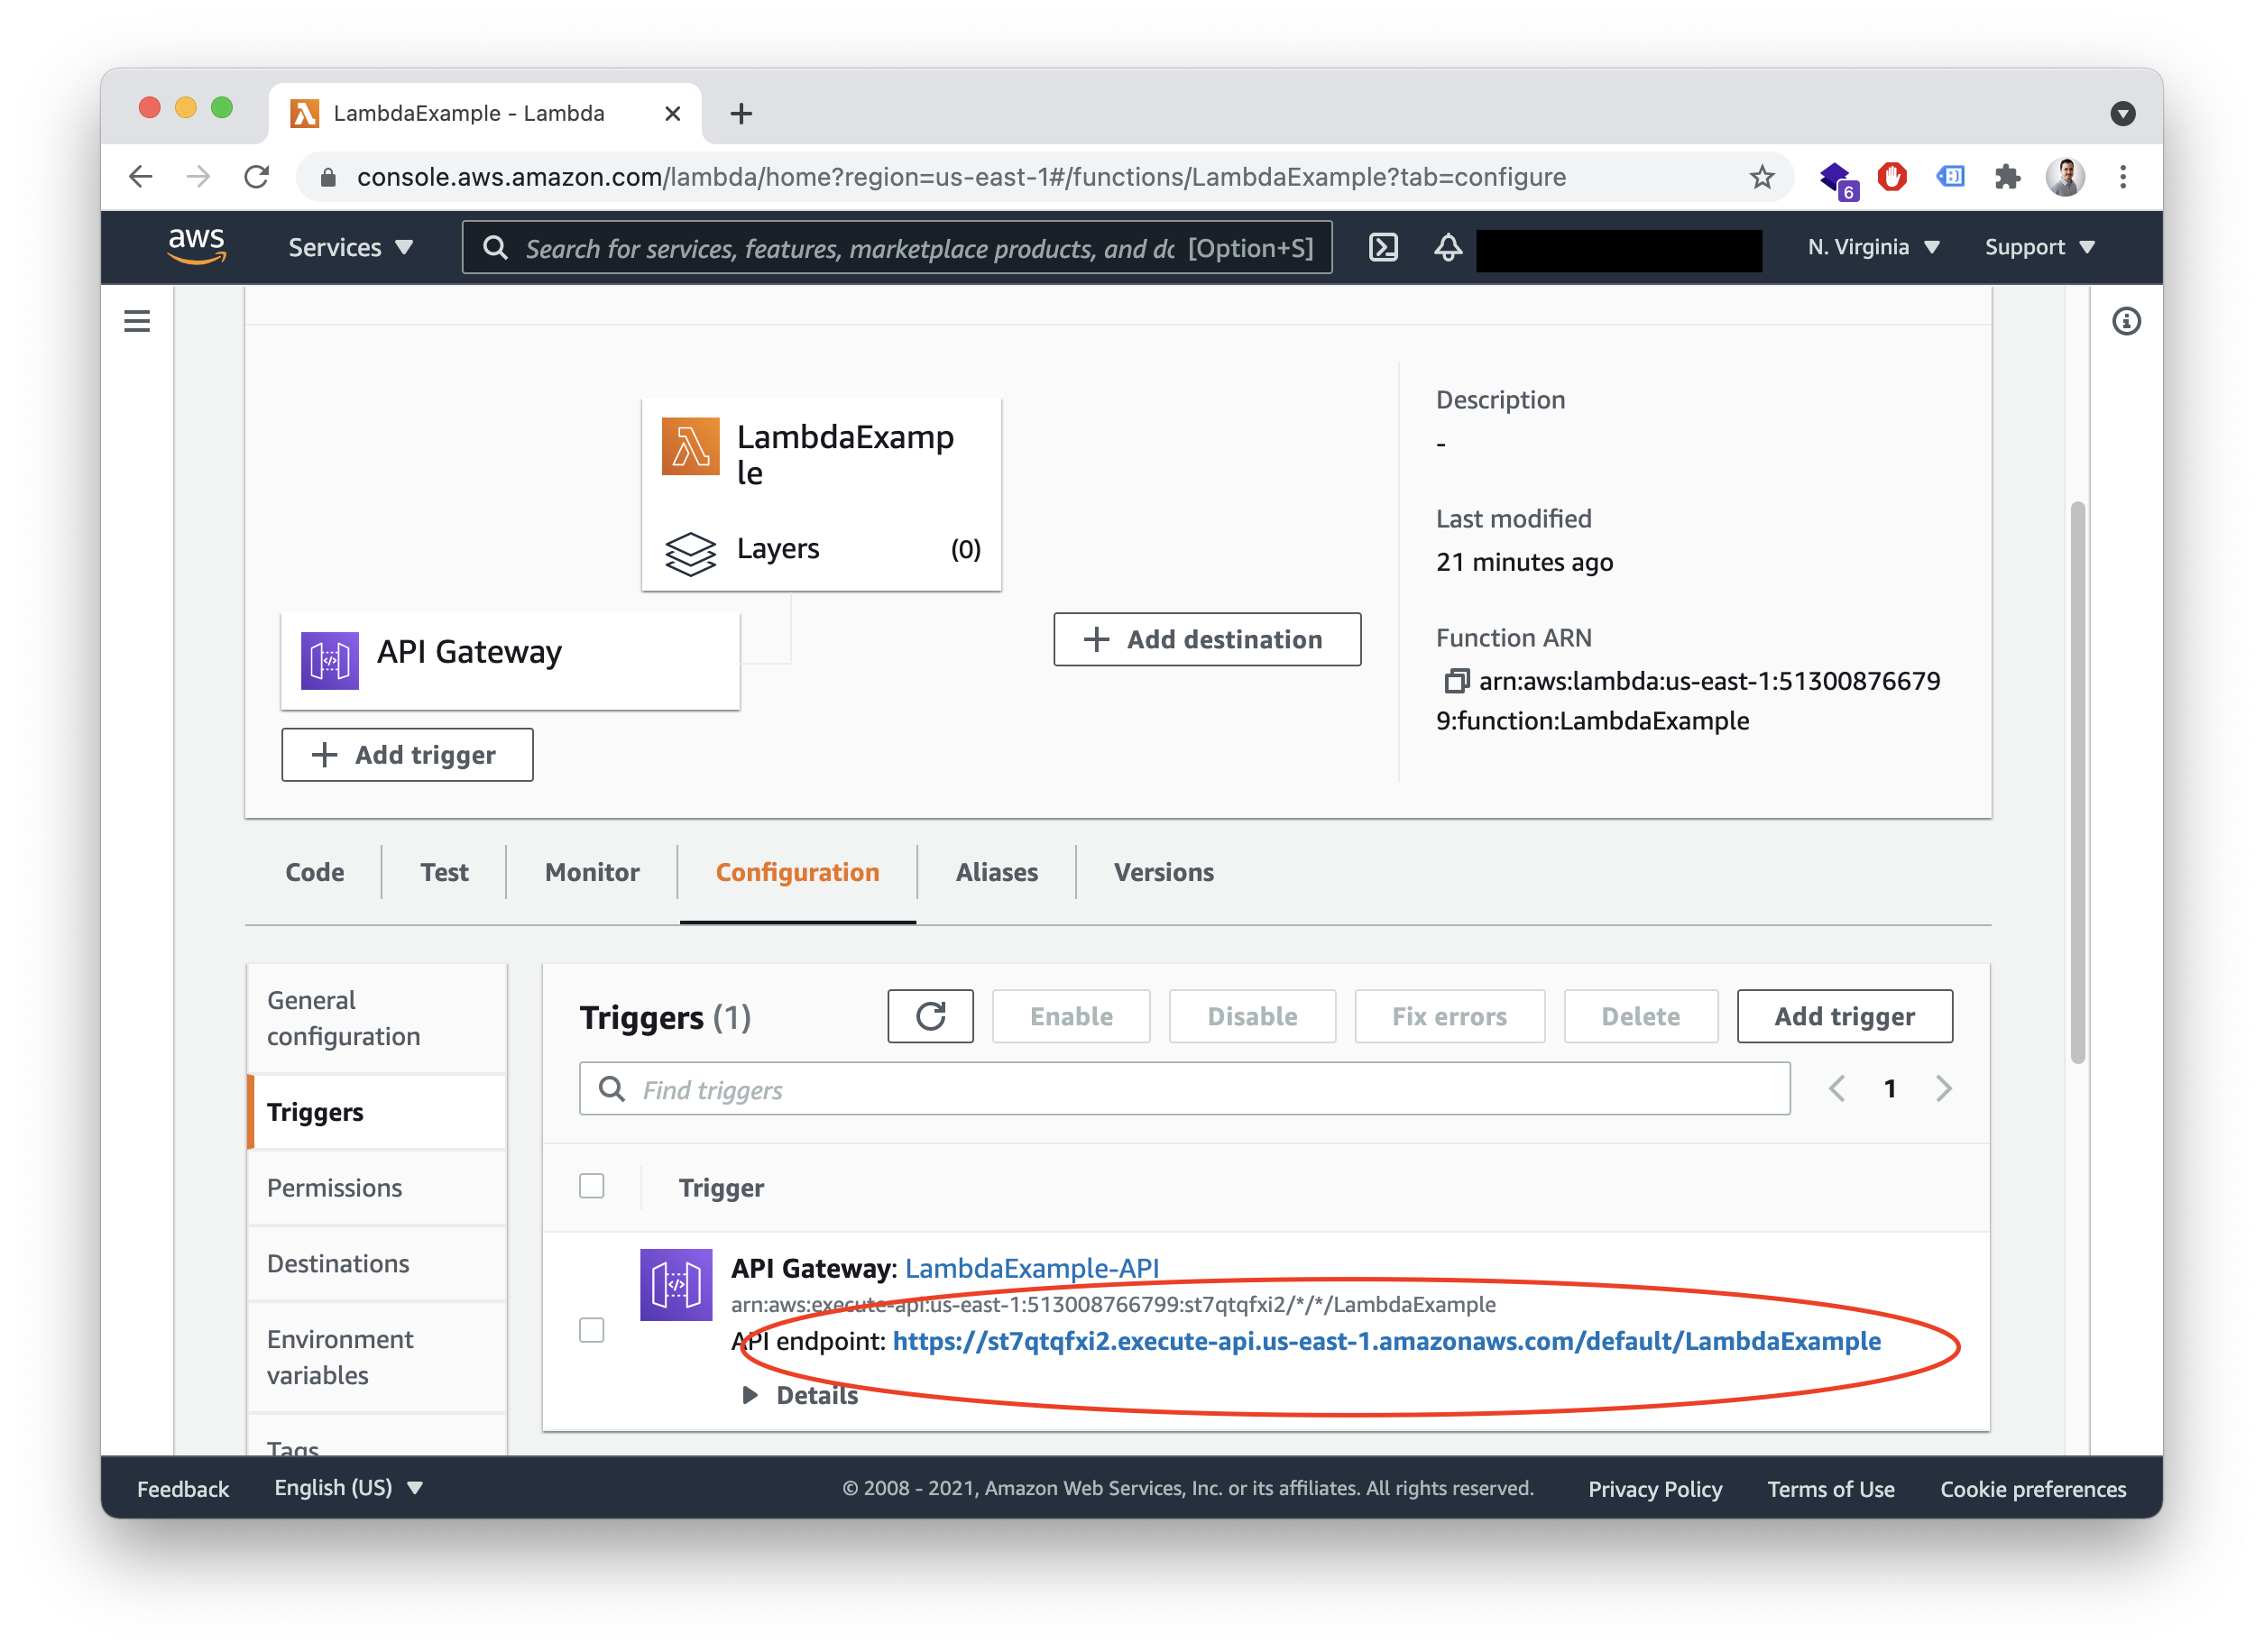
Click on Add Trigger:

Then select API Gateway, REST API as an API type, “Open” as a security mechanism for now, and hit on “add”. Our screens should now look like this, and there it is our API Endpoint.
Validate JSON Request with API Gateway
We can validate the request before it even hits our Lambda function thanks to API Gateway. Like this, we will save some money by not executing the function on bad requests.
Click on the link to the API Gateway (not the API Endpoint) to open the settings of our Gateway, you will see something like this:
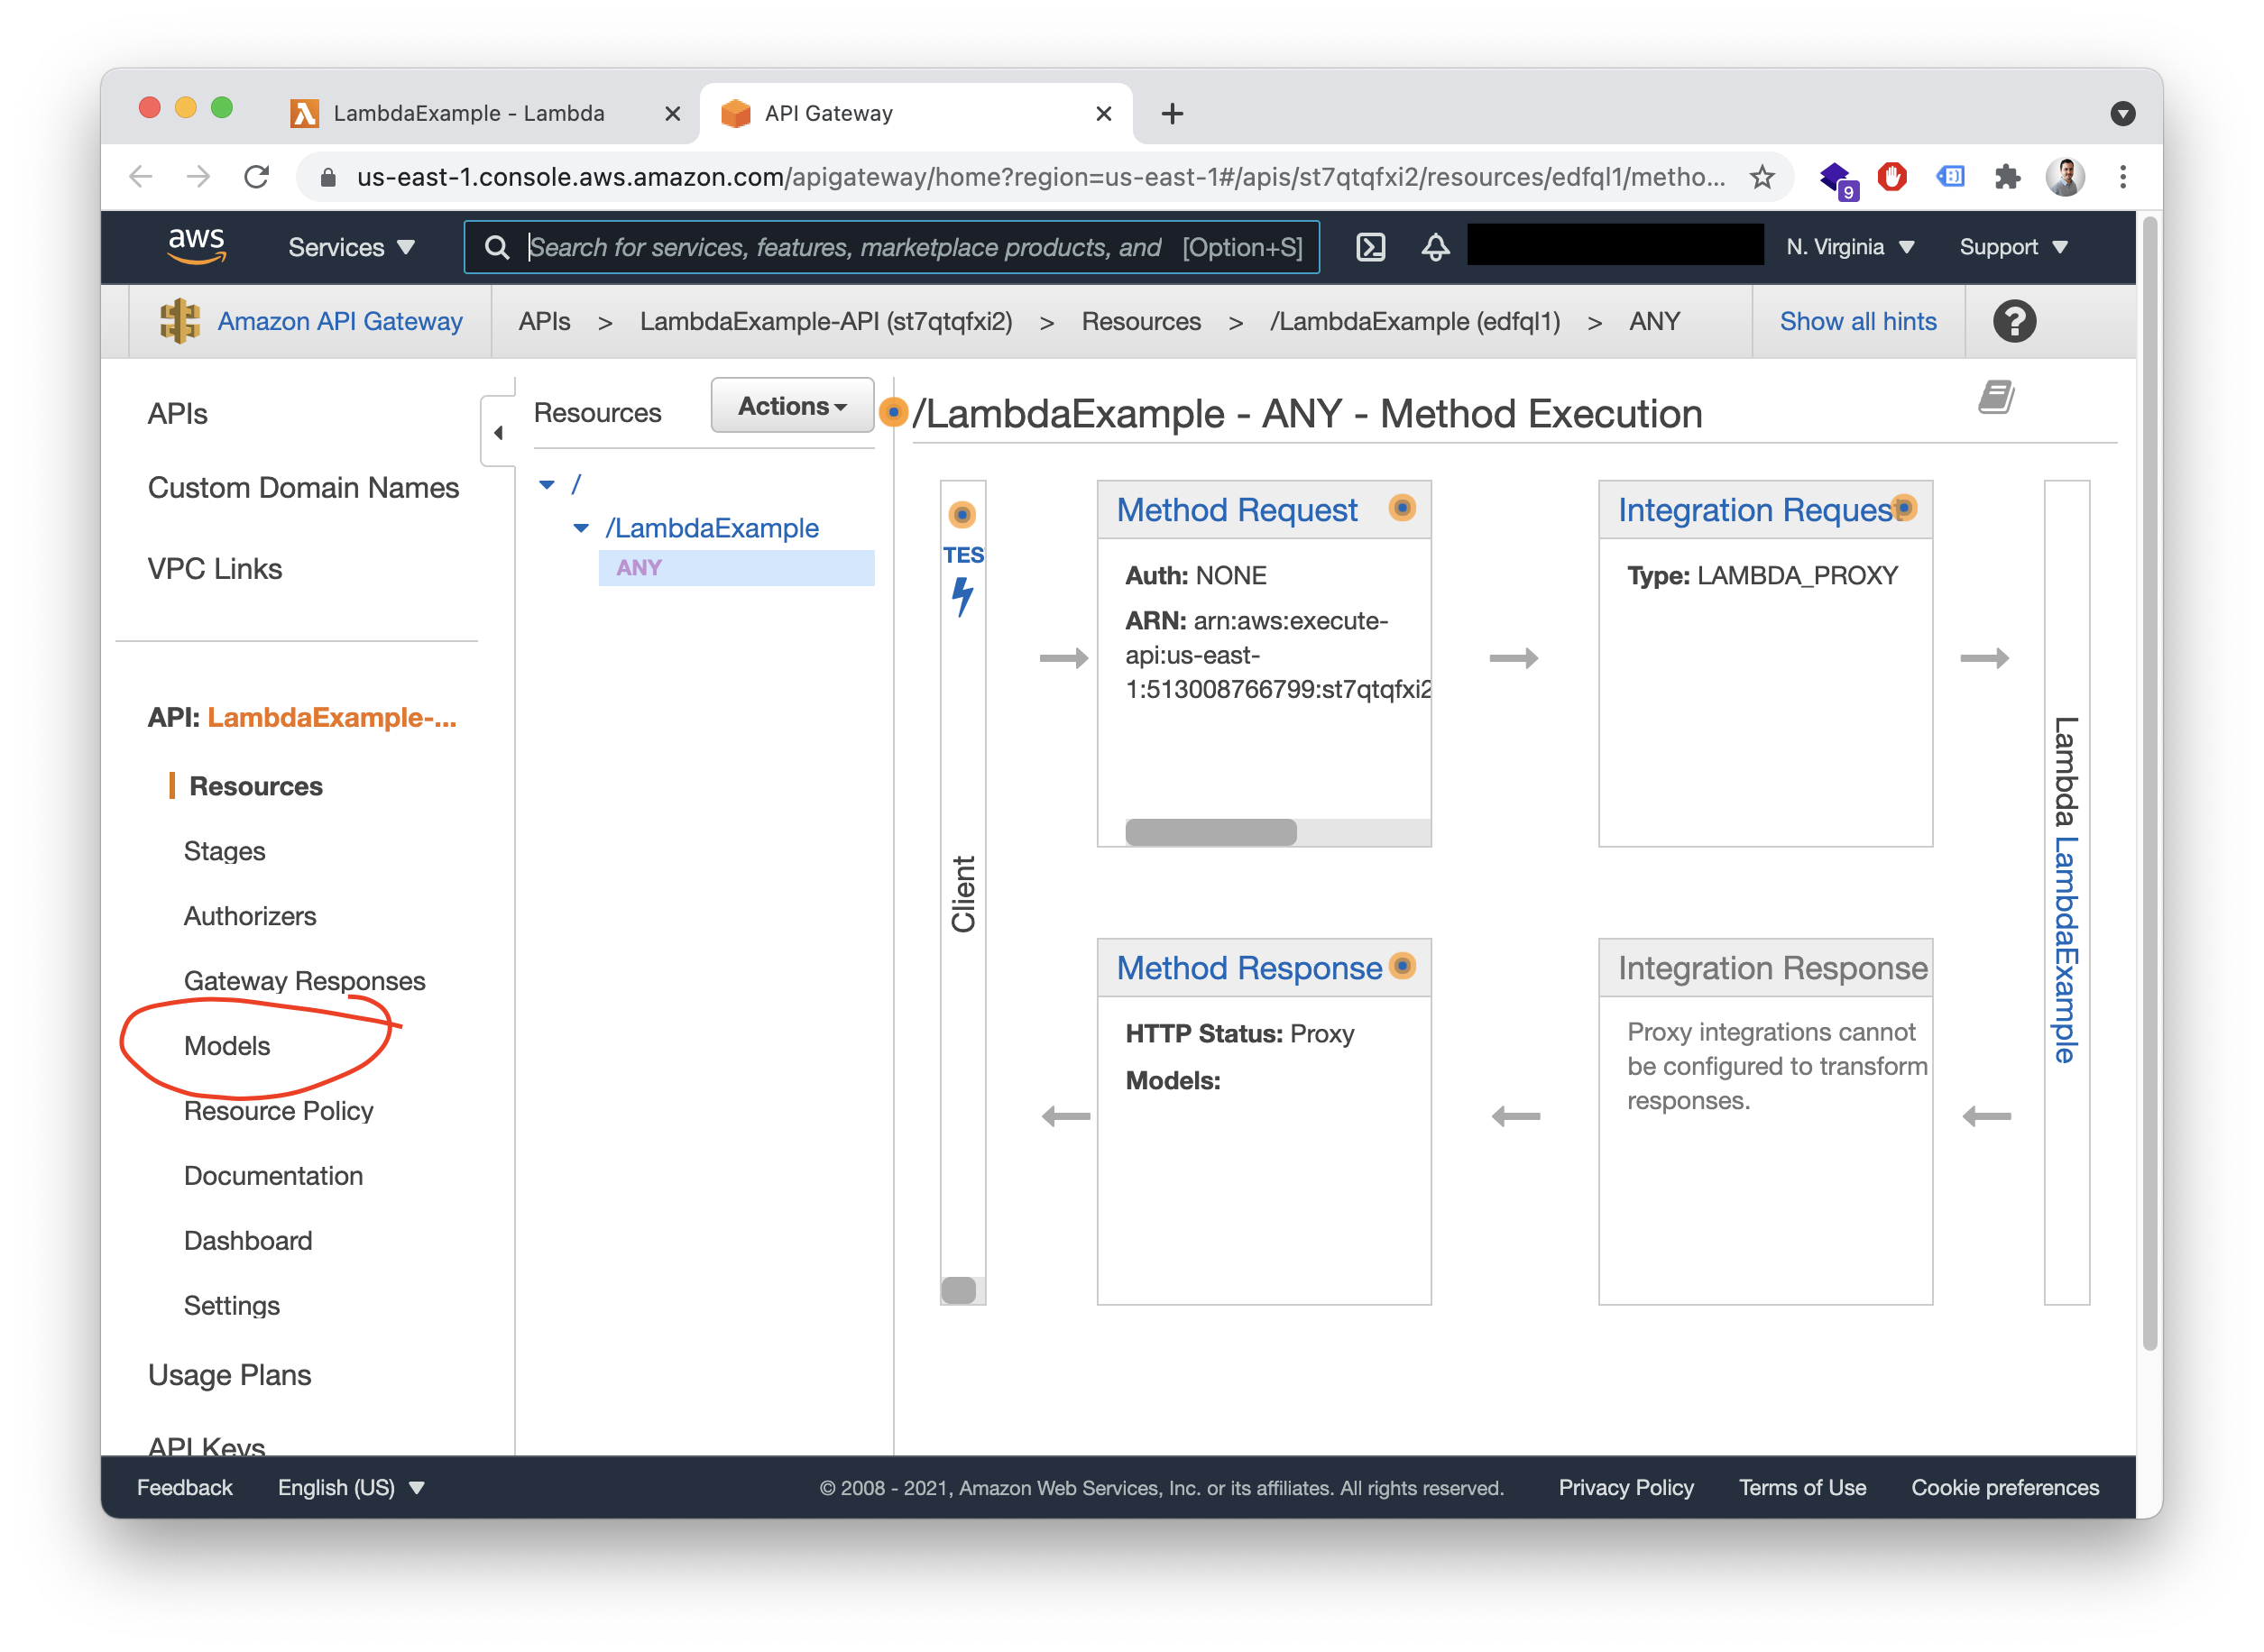
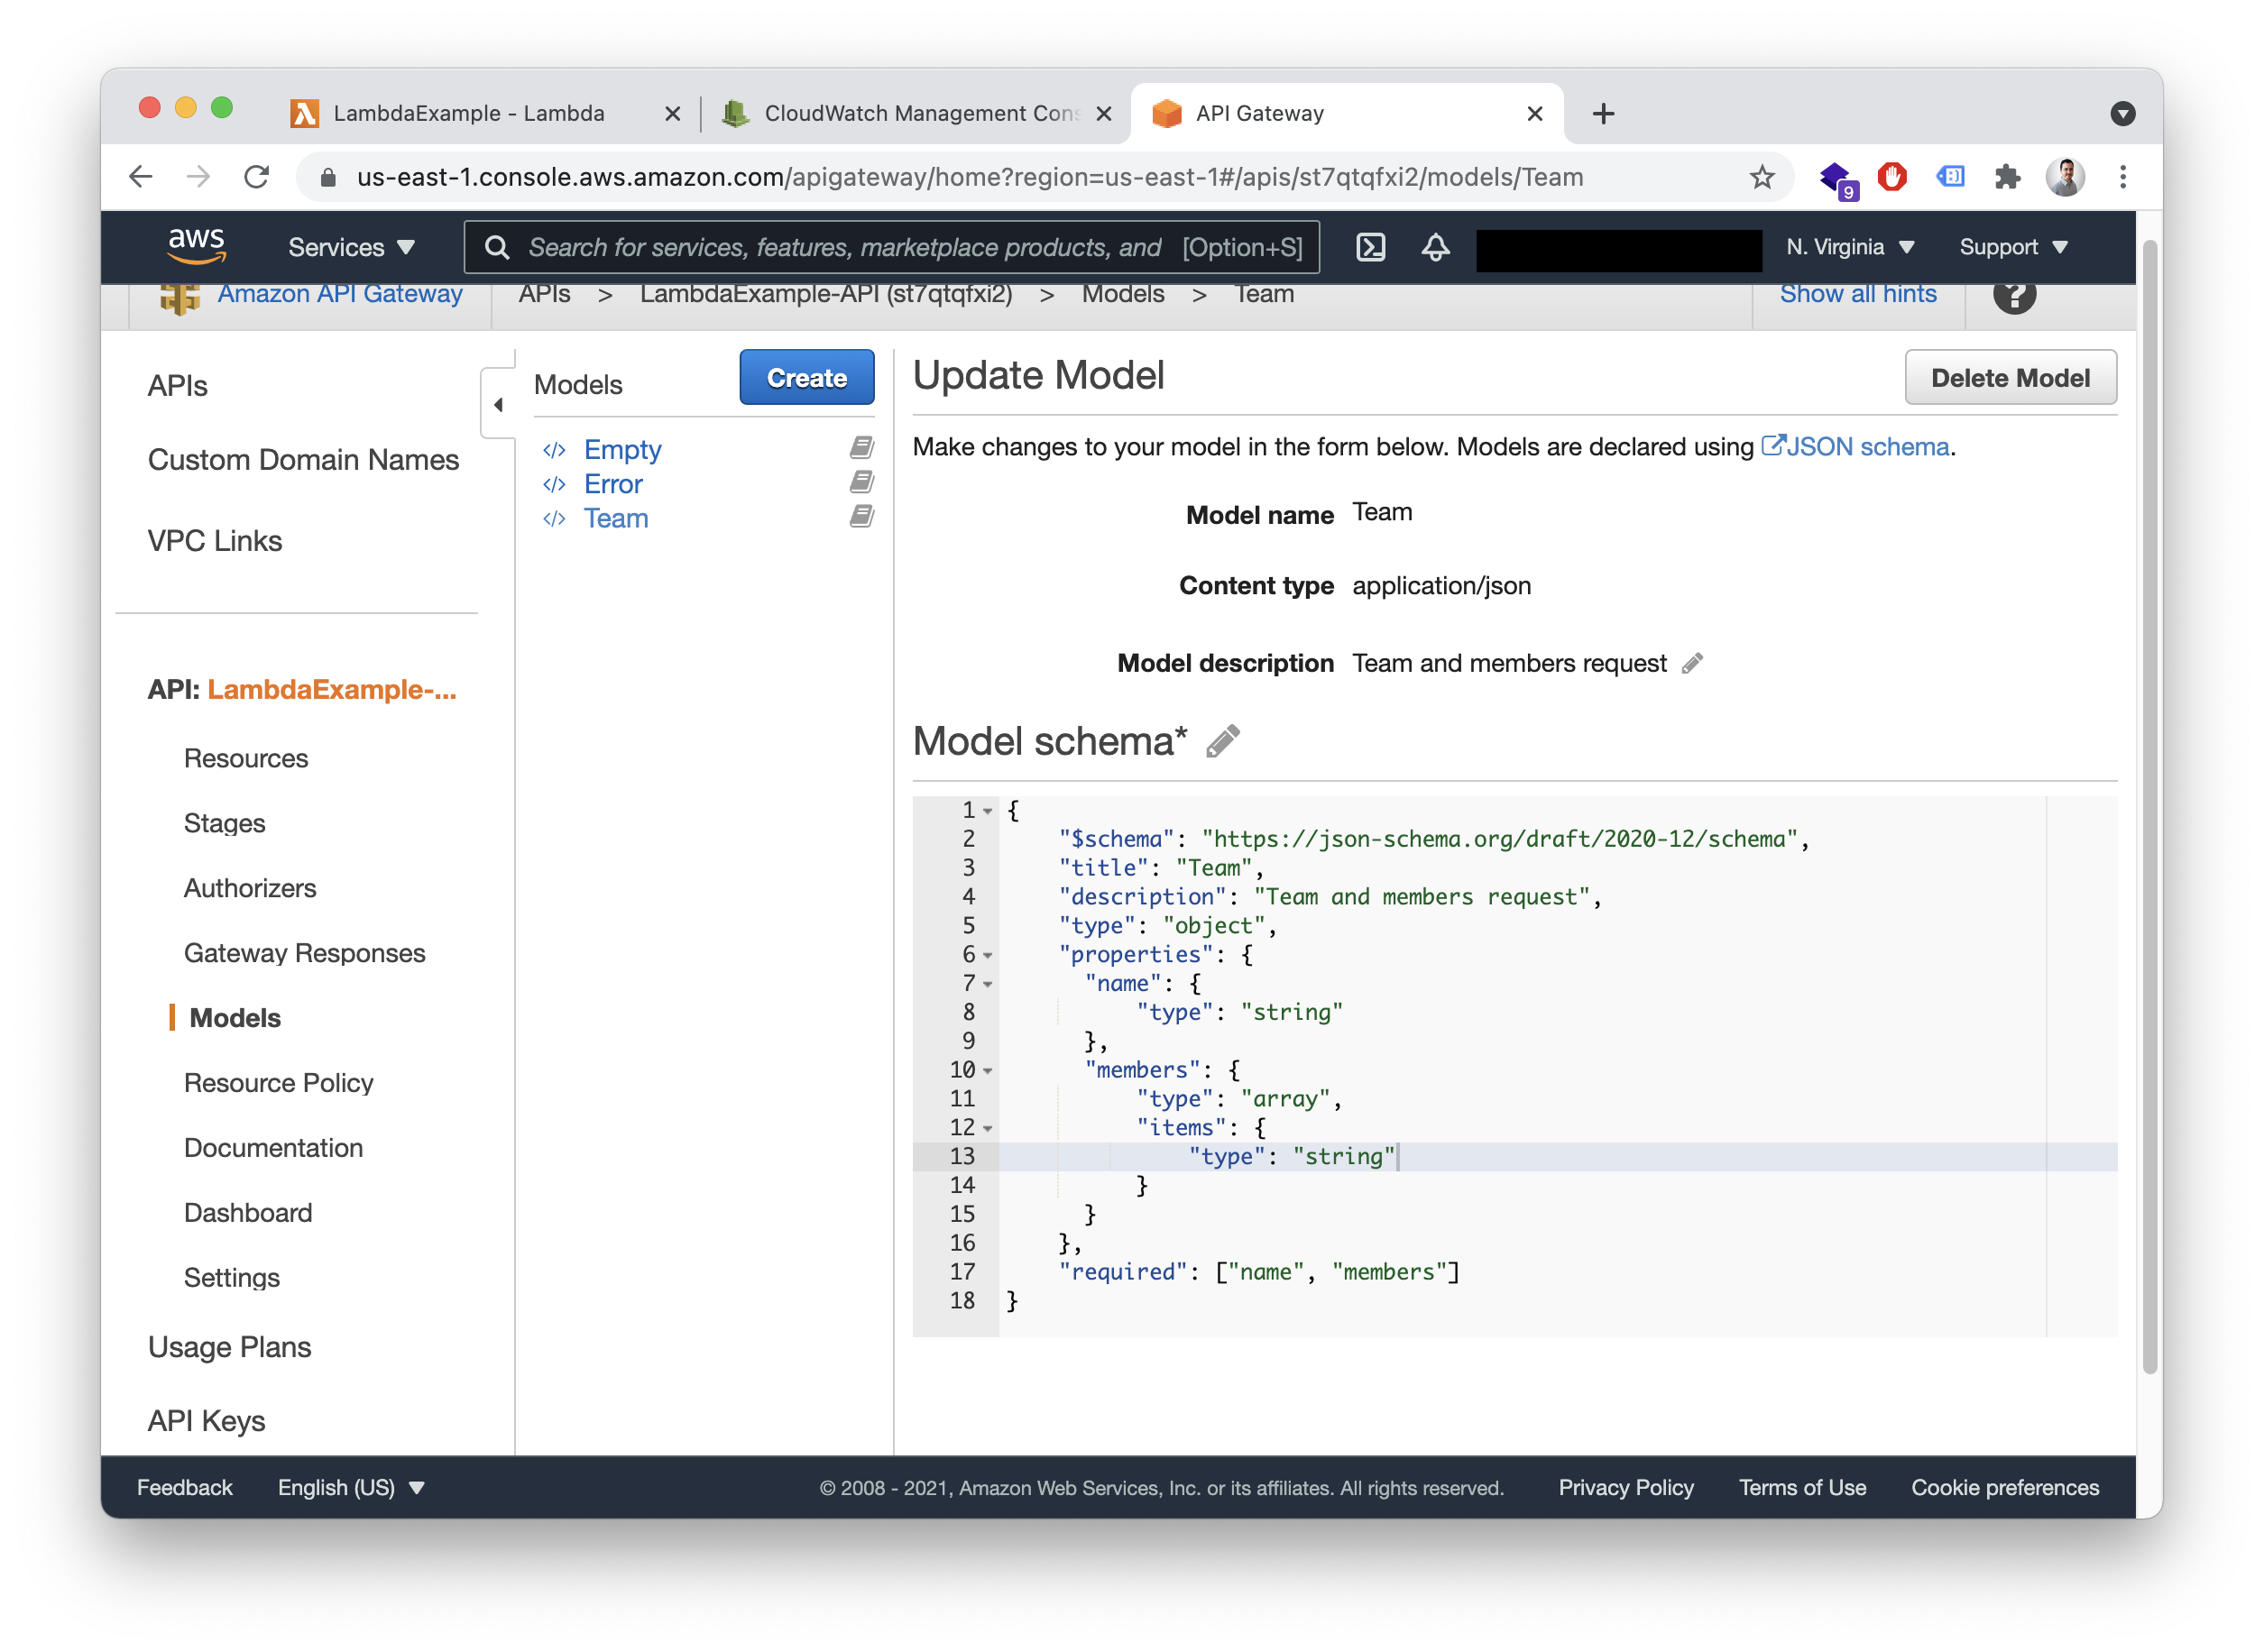
Now click on Models and “create”. Here, we can add a JSON Schema to describe how the request should be done. Going in deep about how to define the JSON Schema and its possibilities is out of the scope of this tutorial, but you can find more documentation here: http://json-schema.org/ All you need to know for now is that you need to define the schema of the request like this:
{
	"$schema": "https://json-schema.org/draft/2020-12/schema",
	"title": "Team",
	"description": "Team and members request",
	"type": "object",
	"properties": {
		"name": {
			"type": "string"
		},
		"members": {
			"type": "array",
			"items": {
				"type": "string"
			}
		}
	},
	"required": ["name", "members"]
}
As you can see, we are defining an object with two fields, name and members. The first one of type string, the second one of type array, with its items of type string. If the request doesn’t follow this schema, the Lambda function won’t be executed.
Paste the JSON, insert a name, and set the Content-type to application/json, like this:
Once the model has been created, go to “Resources”, click on “Actions” and “Create Method”. Select any HTTP Verb you may like, like POST or GET. Once created, select the Lambda Function we just created and create the method. Now Click on Method Request, select Validate body on Request Validator and select the model we just created on Request Body, as on the screenshot:
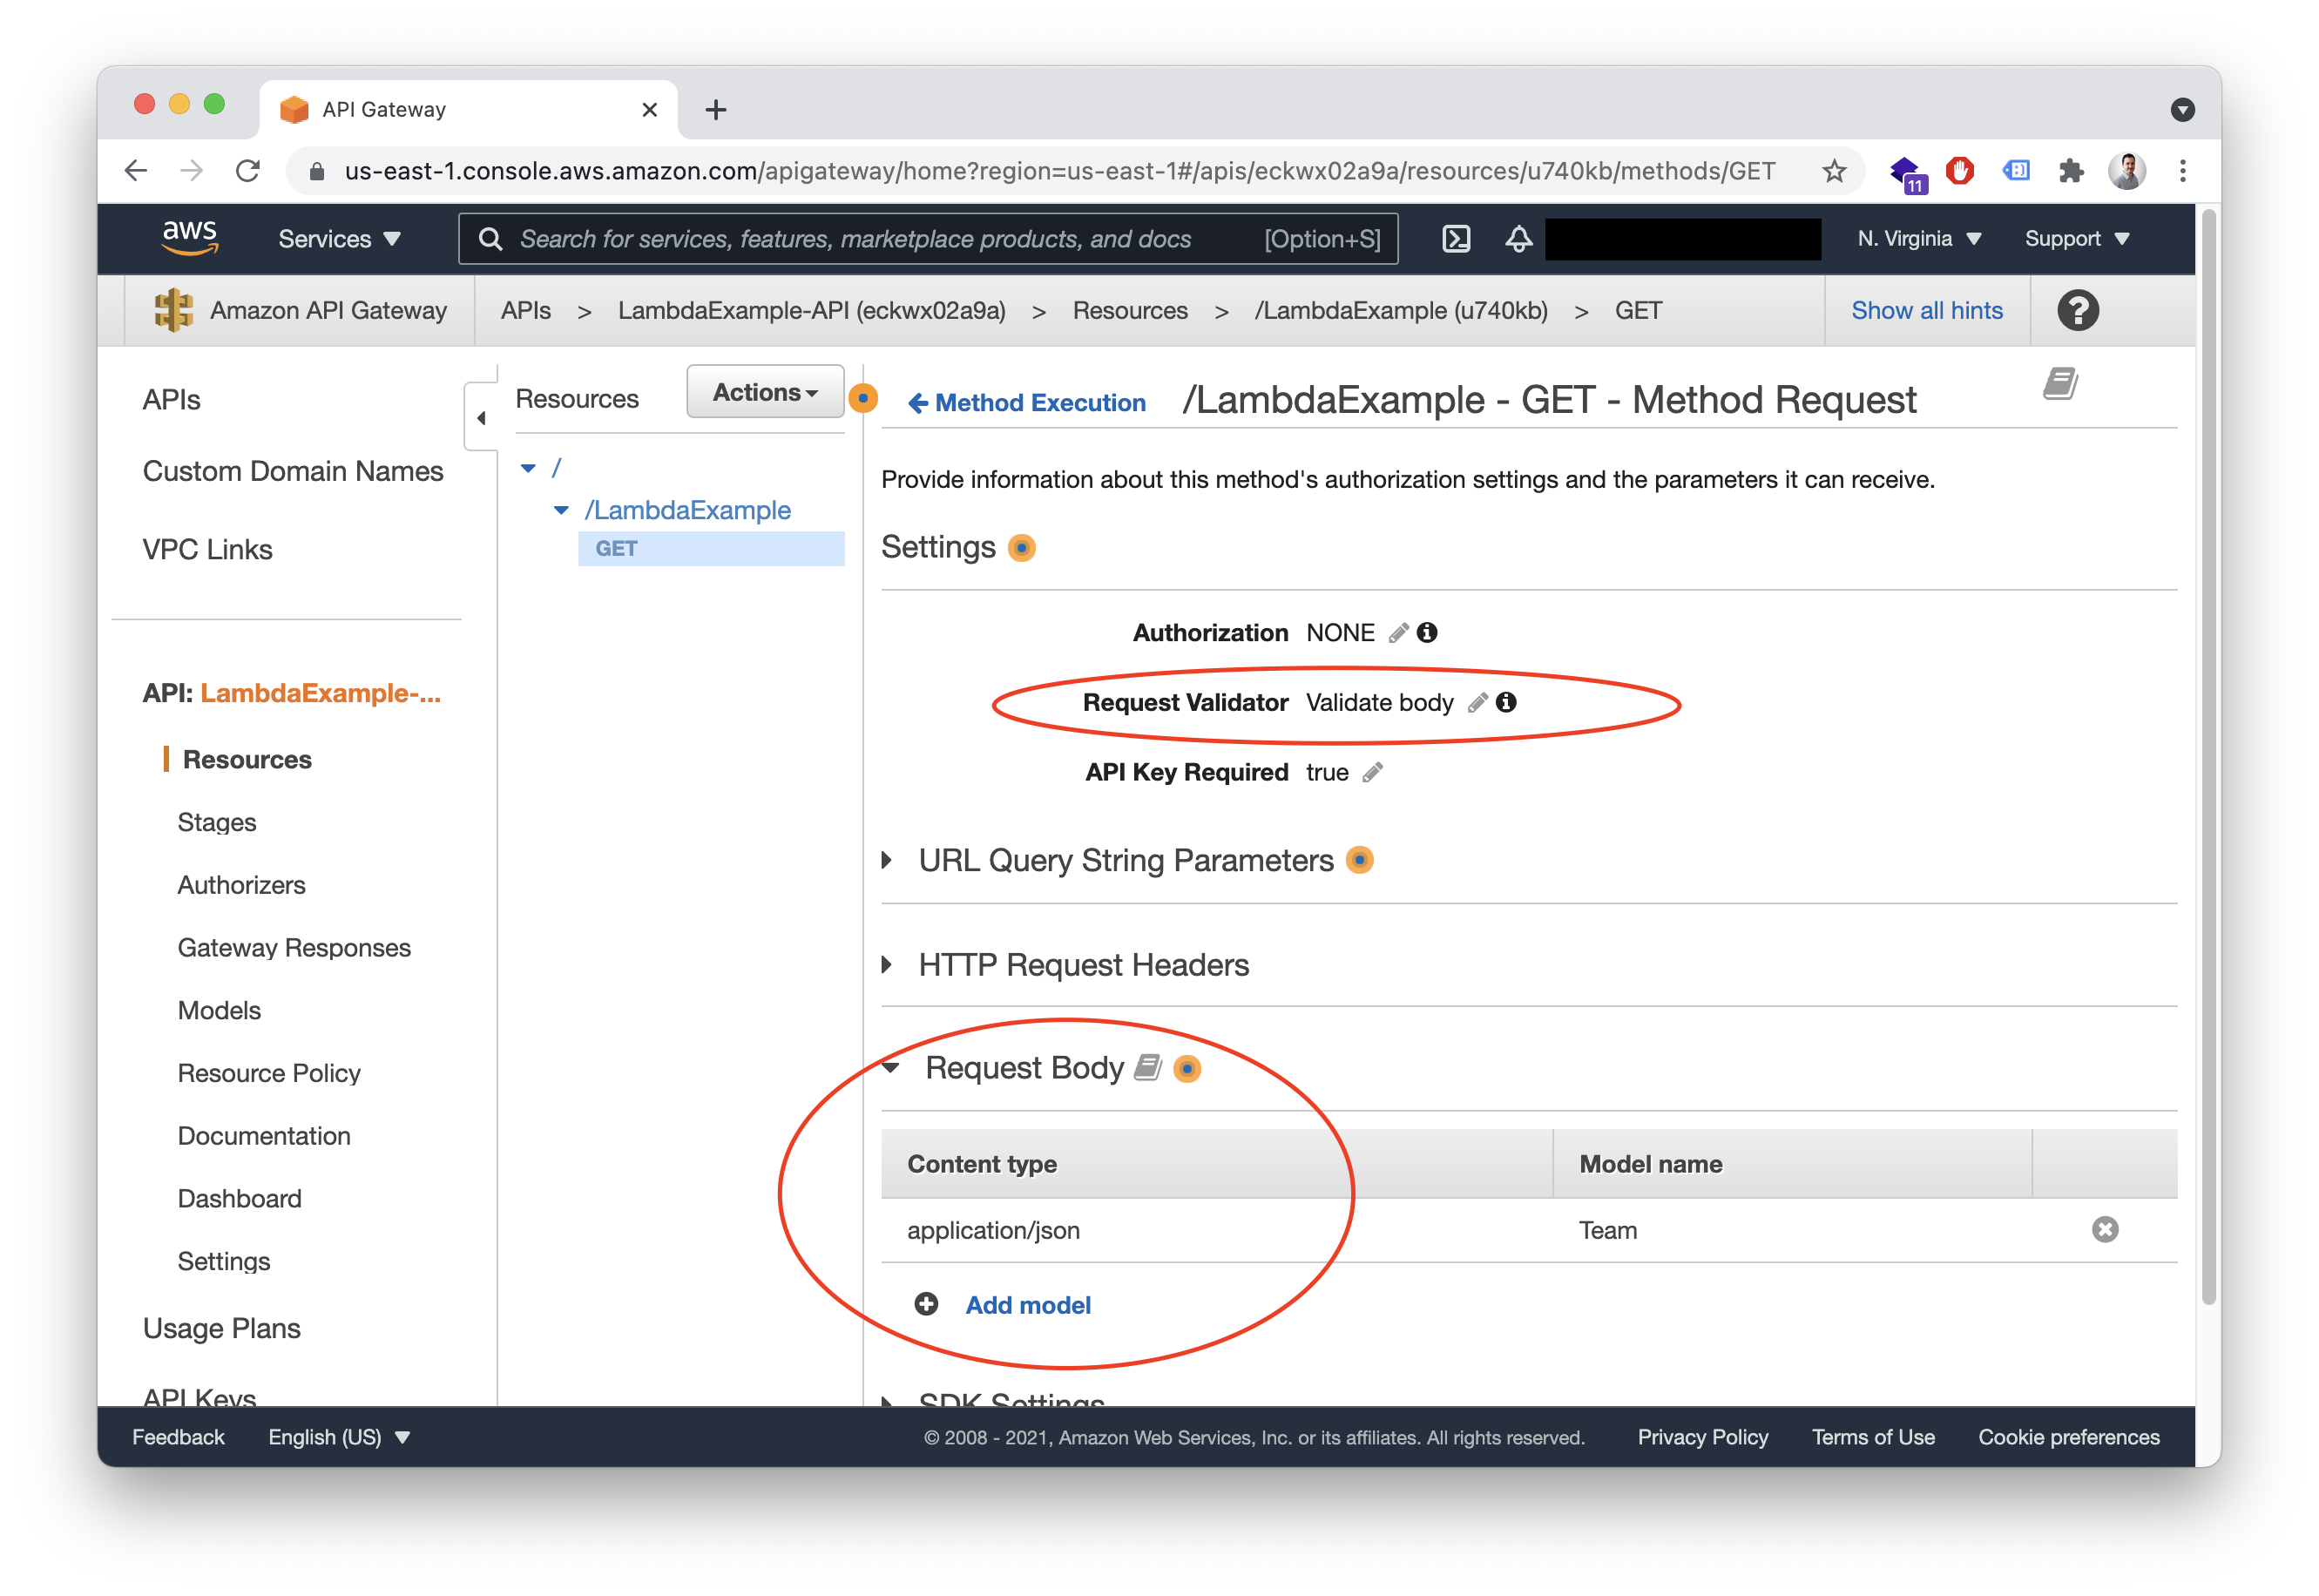
Now, click again on “Actions” and deploy the API. Wait a few seconds, and now if you try to do a bad request, you will get an error.
Add API Keys to Amazon API Gateway
Our API is working and open to the world. We may want to limit this by accepting only requests which include an API Key.
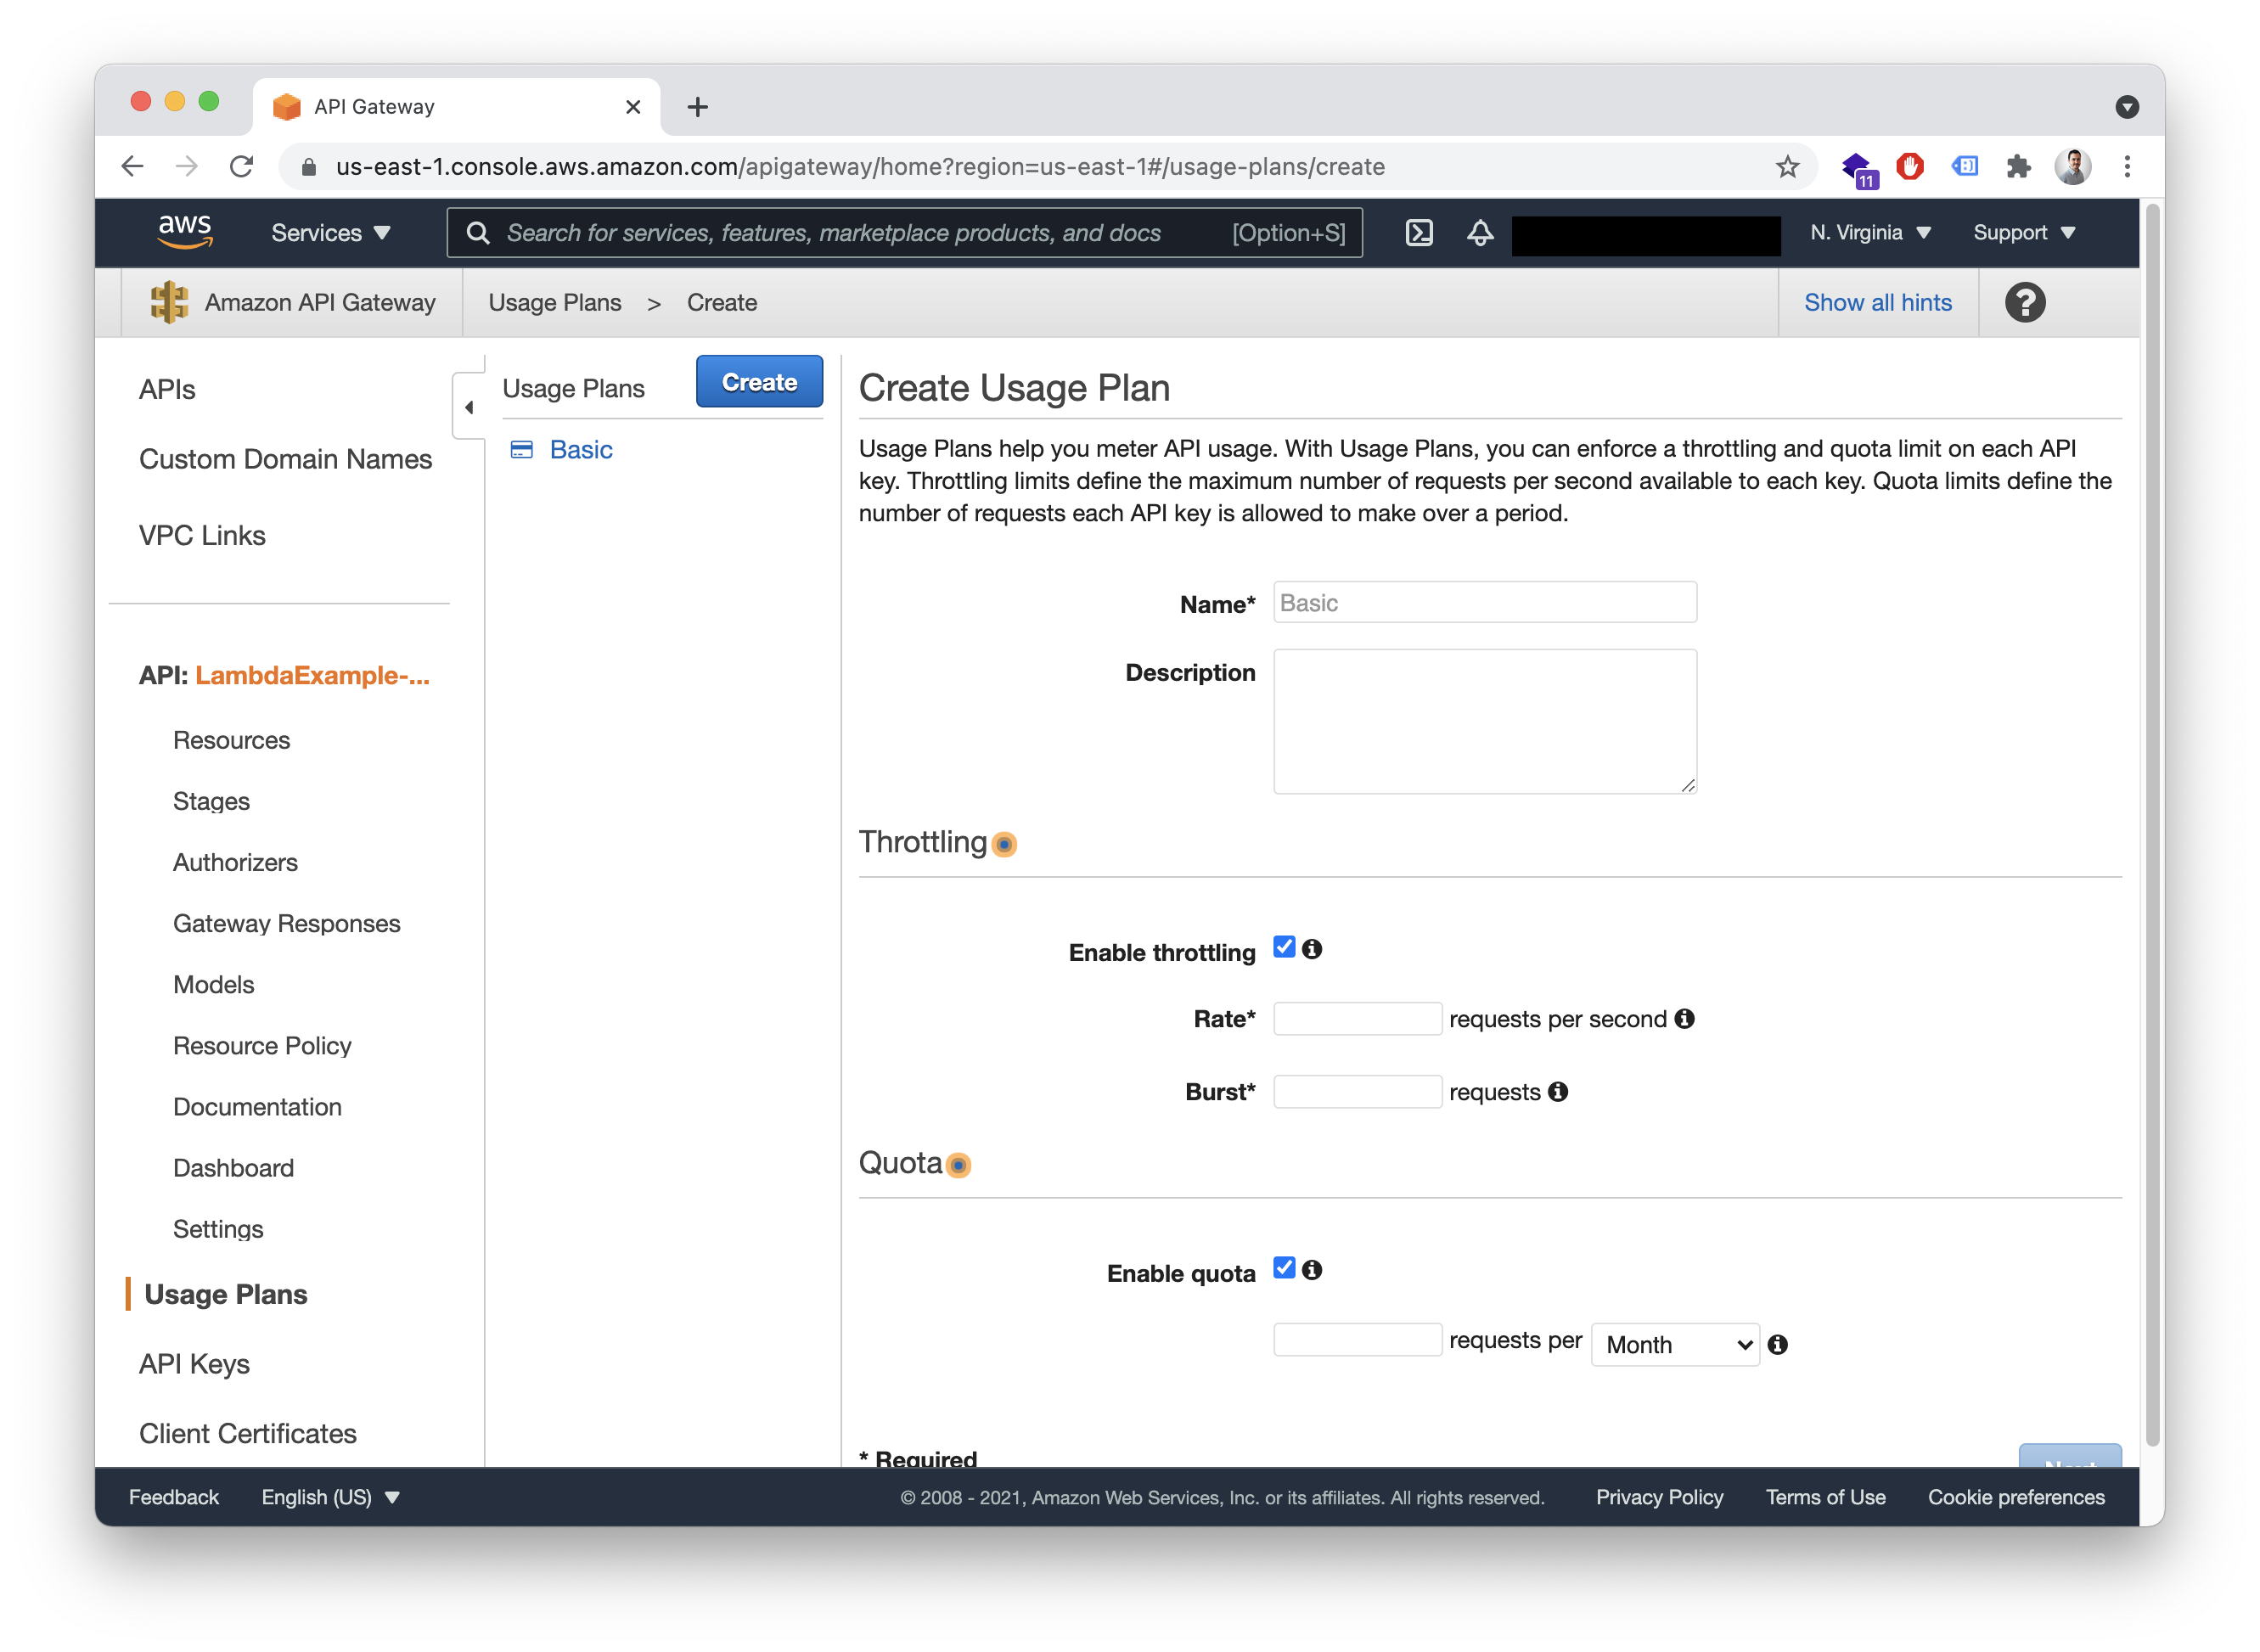
But first, we need to create usage plans. For this, just go to “Usage Plans”, hit on create, select a name, and the options about throttling and quotas that you would like to have.
Now we can go to “API Keys”, create an API Key and assign it to the usage plan. Of course, we can create many different API Keys and usage plans, and of course, we can also do this programmatically using the AWS CLI or the SDK for Go.
Once API Key is created and assigned to an usage plan, we only need to pass it on our request as a header with the name x-api-key.
And that’s all ;)